
A basic digital multimeter (under $25) lets you test a pool pump capacitor’s capacitance, check motor winding resistance for shorts, and verify continuity on wiring — three tests that confirm or rule out the most common pool pump electrical failures before you spend money on parts. Always disconnect power and discharge capacitors before testing.
Why This Skill Matters
I reference multimeter testing throughout the repair guides on this site — testing a capacitor before replacing it, checking motor windings before assuming a motor has failed, verifying voltage at the terminal block. Most residential multimeters under $25 have everything you need: voltage (AC and DC), resistance/continuity, and capacitance settings. Learning these three tests well prevents buying the wrong replacement part.
Complete guide to testing and repairing electric pool pump motors with a multimeter — covers winding tests and capacitor checks in depth.
Safety First — Before Any Test
Turn off power at the breaker, not just the switch, before opening any motor or wiring compartment. Verify with a non-contact voltage tester. Capacitors can hold a dangerous charge even after power is off — discharge by touching both terminals simultaneously with an insulated screwdriver before handling.
Test 1: Capacitor Capacitance
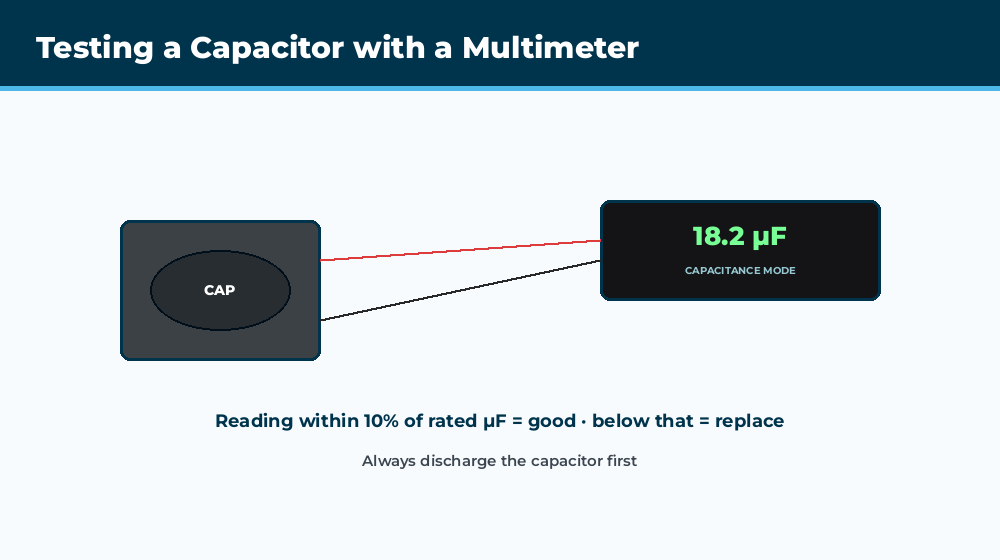
Set the multimeter to capacitance mode (often marked with a “−||−” symbol). Disconnect the capacitor from the motor circuit completely — both wires off. Touch the meter probes to the two capacitor terminals. A healthy capacitor reads within 10% of the microfarad (µF) rating printed on its label. A reading more than 10% below rated µF, or a reading of zero, means the capacitor has failed and needs replacement. See our full capacitor guide for replacement steps.
Test 2: Motor Winding Resistance
Set the multimeter to resistance/ohms mode. With the motor completely disconnected from power and wiring, touch probes to the motor’s winding terminals (consult the wiring diagram on the motor label for terminal identification). You’re looking for a reasonable, non-zero resistance reading between windings — typically a few ohms depending on motor size. A reading of zero ohms (dead short) or infinite resistance (open circuit) both indicate winding failure requiring motor replacement.
Test 3: Winding-to-Ground Insulation
This test catches the kind of fault that causes GFCI tripping. Set to resistance mode (or use a dedicated megohmmeter for a more sensitive reading if available). Touch one probe to a winding terminal and the other to the bare motor frame/ground. You want to see very high resistance — ideally megohms. Low resistance here (a near-short to ground) indicates compromised winding insulation, often from water intrusion via a failed shaft seal, and means motor replacement. See our GFCI tripping guide for how this connects to that symptom.
Test 4: Voltage at the Terminal Block
With power restored and the pump attempting to run, set the multimeter to AC voltage mode and carefully measure across the motor terminal block (L1 to L2 for 230V systems). You should read within 10% of rated voltage — roughly 207–253V for a 230V-rated motor. Voltage significantly outside this range, with the motor still struggling, points to a supply issue (undersized wire, loose connection, voltage drop over a long run) rather than the motor itself.
What a Multimeter Can’t Tell You
A multimeter confirms electrical component health but won’t diagnose mechanical issues like bearing wear, impeller clogs, or seal leaks. Combine electrical testing with the mechanical checks covered in our other guides (spin test for bearings, visual inspection for shaft seal leaks) for a complete diagnosis.
Frequently Asked Questions
What multimeter should I buy for pool pump testing?
A basic digital multimeter with AC/DC voltage, resistance, and capacitance modes — available for $15–25 at any hardware store. You don’t need a professional-grade meter for residential pool pump diagnostics; an inexpensive model with these three functions covers every test in this guide.
Is it dangerous to test a pool pump with a multimeter?
It’s safe if you follow the correct sequence: power off at the breaker, verify with a separate voltage tester, discharge capacitors before handling, and never test live circuits unless specifically measuring voltage with appropriate care. If you’re not comfortable with any of this, have an electrician or pool tech do the testing.
What capacitance reading means my capacitor is bad?
Any reading more than 10% below the rated microfarad (µF) value printed on the capacitor label. A reading of zero or near-zero means the capacitor is completely dead. Replace it — capacitors are inexpensive ($8–20) and this is the most common pool pump electrical failure.
Can I test a pool pump motor without removing it from the pump?
Capacitor and terminal block voltage tests can be done with the motor still mounted, as long as you can access the wiring compartment. Full winding resistance and ground insulation tests are easier with the motor disconnected from wiring, though not necessarily removed from the wet end.
My multimeter shows normal readings but the pump still doesn’t work — what else could it be?
If capacitor, winding resistance, and voltage all test normal, consider mechanical causes: seized bearings (spin the shaft by hand to check), clogged impeller, or a relay/timer issue upstream of the motor that’s preventing power from reaching it consistently.